

Table of Contents
- What You'll Need to Clean Horse Brushes
- How to Remove Hair and Debris from Horse Brushes
- Best Soap for Cleaning Horse Brushes
- Step-by-Step Cleaning Process for Horse Brushes
- Disinfecting Horse Grooming Tools
- Drying Techniques and Importance
- How Often to Clean Your Grooming Kit
- Common Mistakes to Avoid
- Frequently Asked Questions
Last Updated: September 1, 2026
What You'll Need to Clean Horse Brushes
Before you start cleaning your grooming kit, gather the right supplies. You'll need warm water, mild dish soap, and a bucket or basin large enough to hold your brushes. A soft cloth or old towel works well for drying. If you want to disinfect your grooming tools after cleaning, have a disinfectant solution ready, something like a diluted bleach solution or a commercial antibacterial spray.

Having the right setup matters more than most people realize. A dedicated drying rack prevents bristles from bending under their own weight, which damages bristle integrity over time. You can buy one or make a DIY drying rack using a wooden frame with dowels or even a clean dish rack turned upside down. The goal is positioning brushes bristles-down so air circulates freely around them.
Natural fibers like horsehair require gentler handling than synthetic bristles. Keep that in mind as you gather supplies, you may need slightly warmer water for natural fibers to help dissolve oils and debris buildup. Synthetic brushes tolerate hotter water better, but both types benefit from consistent, careful cleaning.
At Horsey Horse Store, we recommend keeping your grooming supplies organized in one place. Our 10-Piece Horse Grooming Kit comes with a tote bag that makes it easy to transport and store all your tools together, keeping them clean and protected between uses.
How to Remove Hair and Debris from Horse Brushes
The first step in cleaning your grooming kit is removing loose hair and debris. This prevents hair accumulation from clogging your cleaning water and damaging bristles during the washing process.
Use your fingers or a fine-tooth comb to pull hair out of the brush. Start at the base of the bristles and work outward, pulling gently but firmly. For a curry comb or dandy brush with wider spacing, you can often pull out large clumps of hair by hand. A body brush or mane and tail brush with tighter bristles needs more patience, work through small sections at a time.
Some brushes have stubborn debris wedged deep in the bristles. A soft toothbrush or old hairbrush works surprisingly well for this. Gently brush against the bristles to loosen packed-in hair and dirt. Never scrub aggressively, you're loosening debris, not damaging the bristles themselves.
Once you've removed the visible hair, tap the brush gently against a trash can or outside to dislodge any remaining dust and loose particles. This extra minute of prep work prevents preventative maintenance headaches later.
Best Soap for Cleaning Horse Brushes
The soap you choose affects how well your brushes clean and how long they last. Mild dish soap is your best option for most grooming tools. It breaks down oils and sweat without being harsh enough to damage bristles or wooden handles.
Avoid harsh detergents or bleach-based cleaners on brushes with natural fibers. These can dry out horsehair and make it brittle. Synthetic bristles tolerate stronger cleaners better, but mild soap still works effectively for them.
Warm water enhances soap's cleaning power. Hot water works faster, but lukewarm water is gentler on natural fibers and wooden handles. If your brushes have wooden components, avoid water that's too hot, it can warp the wood or loosen bristles from their base.
Some riders prefer antibacterial soap for extra disinfection during cleaning. This is fine, but remember that antibacterial properties don't last long once the soap rinses away. True disinfection requires a separate step with actual disinfectant solution, which we'll cover later.
Step-by-Step Cleaning Process for Horse Brushes
Cleaning your grooming kit is straightforward once you understand the process. The key is being thorough without rushing, each step serves a purpose.
Soaking and Agitation
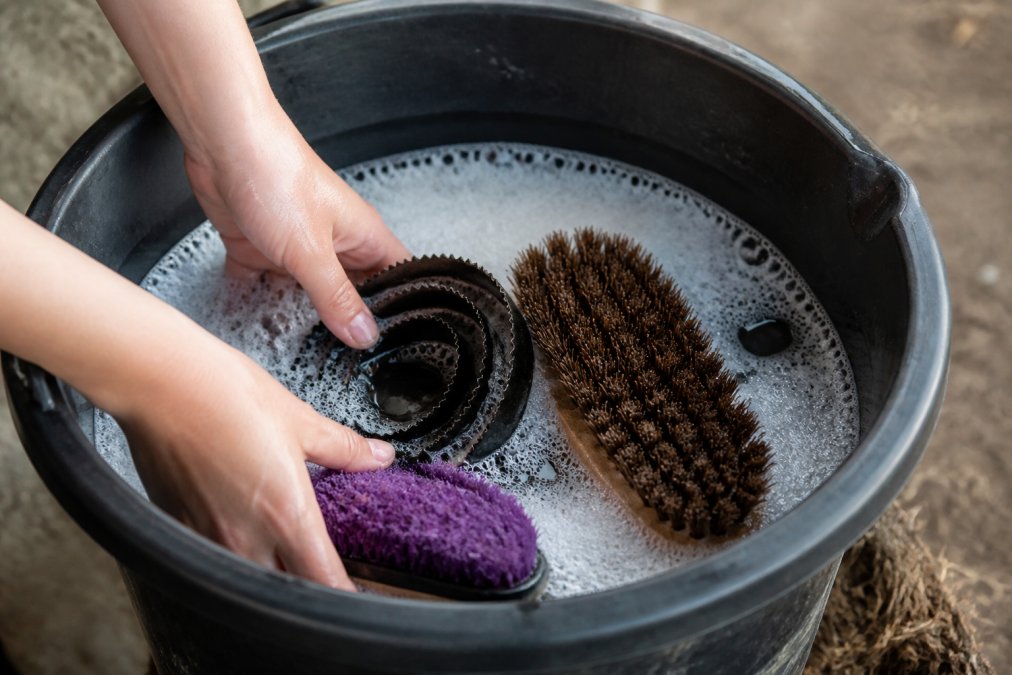
Fill your bucket with warm water and add a squirt of mild dish soap. The water should feel warm to your touch but not so hot it's uncomfortable. Submerge all your brushes and let them soak for 5-10 minutes. This gives the soap time to break down oils, sweat, and any remaining debris.
After soaking, agitation helps loosen stubborn residue buildup. Use your fingers to work the soapy water through the bristles. For brushes with tightly packed bristles, gently squeeze the soapy water through them several times. For wider-spaced brushes like a curry comb, rub the bristles together in the water to create friction that lifts dirt.
Don't scrub aggressively against hard surfaces. That damages bristles and wooden handles. Instead, work the soap through the bristles with gentle squeezing and rubbing motions. You're using agitation to help soap penetrate, not force-cleaning the brush.
Let the brushes soak another few minutes after agitation, then drain the dirty water. If the water is still very murky, repeat the soaking and agitation process with fresh soapy water. Most brushes need only one or two soaks, but heavily used grooming tools might need three.
Rinsing Thoroughly
Rinsing thoroughly is where many people cut corners, and it's a mistake. Soap residue left on bristles attracts dirt and can irritate your horse's skin during grooming.
Hold each brush under clean running water and rinse thoroughly. Let water flow through the bristles from base to tip. Squeeze the bristles gently under the running water to push soapy water out. For a curry comb or dandy brush, rinse both sides equally.
Keep rinsing until the water runs completely clear and you don't see any soap suds. This usually takes 30-60 seconds per brush. If you're rinsing multiple brushes, use fresh water rather than letting dirty rinse water pool in your sink, it defeats the purpose.
The rinse step prevents cross-contamination of your horse's skin. Any soap residue can irritate sensitive areas and potentially cause dermatological issues over time, especially if your horse has existing skin sensitivities (the American Academy of Dermatology).
Disinfecting Horse Grooming Tools
Cleaning removes dirt and debris. Disinfecting removes fungal spores and bacteria that can spread between horses or cause skin infections.
You don't need to disinfect every time you clean, but doing it weekly or after treating a horse with any skin condition is smart practice. Fungal spores and bacteria can survive on bristles even after cleaning, so disinfection adds an important layer of protection for equine hygiene (peer-reviewed research).
Mix a disinfectant solution using one part household bleach to ten parts water (the CDC). Let your brushes soak in this solution for 10-15 minutes. Alternatively, use a commercial antibacterial spray designed for grooming tools, follow the product instructions for contact time.
After disinfecting, rinse the brushes thoroughly under clean running water. You want to remove all traces of disinfectant before the brushes touch your horse. Let the brushes air dry completely before storing them.
Drying Techniques and Importance
How you dry your brushes matters as much as how you clean them. Improper drying can trap moisture, promote mold growth, and damage bristles.
After rinsing, gently squeeze excess water from the bristles. Don't wring them like you would a washcloth, that twists bristles and damages bristle integrity. Instead, hold the brush and gently squeeze the bristles between your palms, letting water run out.
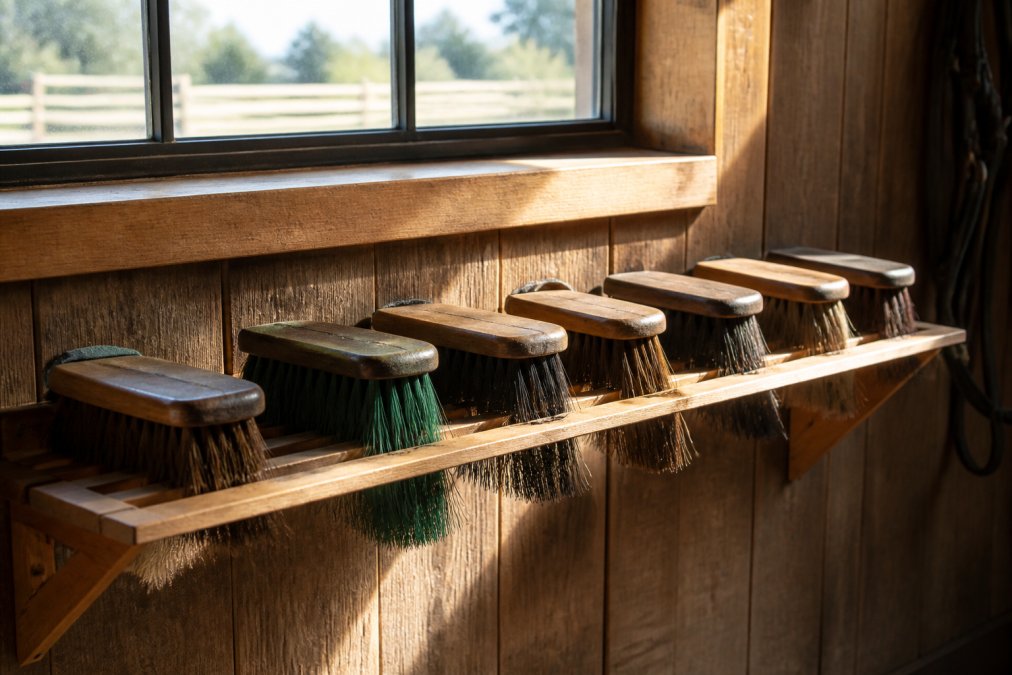
Place brushes bristles-down on a drying rack or clean towel in a well-ventilated area. Bristles-down positioning is critical because it allows water to drain away from the base of the bristles, where moisture can cause mold or loosen bristle attachment. Never place drying brushes bristles-up, water pools in the bristles and takes forever to dry.
Air drying takes 24-48 hours depending on humidity and air circulation. Speed up the process by placing brushes in a sunny spot or near a fan. Direct sunlight helps kill remaining bacteria and prevents fungal growth. In humid climates, ensure good air movement around drying brushes.
Never use a heat source like a hair dryer or heater to speed drying. Heat can warp wooden handles and damage both natural and synthetic bristles. Patient air drying preserves your brushes much longer than rushing the process.
How Often to Clean Your Grooming Kit
Cleaning frequency depends on how often you use your brushes and your horse's condition. A grooming kit used daily on a healthy horse should be cleaned weekly. If you groom multiple horses, clean more frequently to prevent cross-contamination.
Horses with skin conditions like fungal infections or dermatological issues require more frequent cleaning. In these cases, clean your grooming tools after every use. This prevents spreading the condition to other horses or reinfecting the same horse.
Brushes used for trail riding or outdoor work get dirtier faster than those used for arena work. If your brushes visibly caked with dried mud or sweat, clean them immediately rather than waiting for your scheduled cleaning day. Letting debris buildup sit on brushes damages bristles and makes cleaning harder.
During winter months when horses have thick coats, grooming produces more hair accumulation. You might need to clean your brushes more frequently just because they fill with hair faster. Pay attention to how your brushes look and feel, they'll tell you when they need cleaning.
Common Mistakes to Avoid
Understanding what not to do prevents damage to your brushes and keeps your grooming routine effective.
Don't soak brushes in water that's too hot. This warps wooden handles and can loosen bristles from their base. Lukewarm to warm water is plenty hot enough to activate soap and clean effectively.
Avoid using harsh chemicals or bleach directly on brushes. These damage bristles and can leave residue that irritates your horse's skin. Stick with mild dish soap for regular cleaning and a diluted bleach solution only for disinfection.
Don't skip the debris removal step. Jumping straight to soaking means hair and dirt float around in your cleaning water, making the whole process less effective. Five minutes of removing hair saves time overall.
Never store brushes while damp or before they're completely dry. Moisture trapped in bristles promotes mold and fungal growth. Always wait until brushes are fully dry before putting them away.
Avoid storing brushes in a damp location like a basement or unheated barn. Humidity and temperature fluctuations damage bristles and wooden handles. Store your grooming kit in a dry, temperature-stable area.
Don't use the same brush on multiple horses without cleaning between uses. This spreads bacteria and fungal spores, creating cross-contamination issues. If you groom several horses, either clean between each horse or use separate brushes for each horse.
The Horsey Horse Store team recommends investing in a quality grooming storage solution like our ROYAL HOUSE 1216 Grooming Bag. Keeping your brushes organized and protected in one place makes it easier to maintain them properly and prevents damage from being tossed loose in a tack room.

Keeping your grooming kit clean is foundational to horse health and equipment longevity. A well-maintained grooming kit lasts years longer and prevents skin issues that come from using dirty brushes. The process takes less than an hour weekly and becomes routine once you establish the habit. Start with our 8-Piece Horse Grooming Box Kit to ensure you have quality brushes worth maintaining, then follow this guide to keep them in top condition for years of use.

Frequently Asked Questions
What is the most effective way to wash horse brushes?
The most effective way to clean horse brushes is to remove loose debris first, then soak them in warm water with mild dish soap for 10-15 minutes. Use gentle agitation to loosen residue buildup, rinse thoroughly under running water, and air dry bristles-down. For synthetic bristles, this process maintains bristle integrity and removes hair accumulation. For natural fibers, avoid excessive heat and always rinse completely to prevent soap residue that can damage the bristles.
How can you remove hair and dander buildup from horse brushes?
Start by hand-picking large hair clumps from the brush, then soak the brush in warm water for 10 minutes to soften debris. Use a fine-tooth comb or old toothbrush to gently rake through the bristles and loosen trapped hair. For stubborn dandruff and dander, soak longer and use slightly warmer water. Rinse under running water while continuing to work the comb through the bristles. This preventative maintenance prevents cross-contamination and keeps your grooming kit hygienic for your horse's skin health.
How often should you clean your horse brushes?
Clean your horse brushes weekly if you groom regularly, or after every few uses if you notice visible hair accumulation or residue buildup. For brushes used on multiple horses, sanitize after each horse to prevent cross-contamination and potential dermatological issues or fungal spores transfer. Disinfect your entire grooming kit monthly as part of stable hygiene maintenance. Regular cleaning extends the life of both natural and synthetic bristles and supports your horse's skin health.
Can you use dish soap to clean horse brushes?
Yes, mild dish soap is one of the best options for cleaning horse brushes. Use warm water with a small amount of dish soap to avoid residue buildup that can damage bristles. Avoid harsh detergents or bleach, which can weaken synthetic bristles and damage natural fibers. Rinse thoroughly after washing to remove all soap residue. For disinfecting, you can add a small amount of antibacterial dish soap, but always rinse completely. This gentle approach maintains bristle integrity while effectively removing hair, debris, and bacteria from your grooming tools.
This article was written using GrandRanker