

Table of Contents
- Step 1: Declutter and Purge Before You Organize
- Step 2: Tack Room Storage Ideas That Actually Work
- Step 3: DIY Tack Room Organization on Any Budget
- Step 4: Plan an Ergonomic Equestrian Tack Room Layout
- Step 5: Pest-Proof Storage and Climate Control
- Step 6: Tack Room Cleaning and Maintenance Routines
- Step 7: Digital Inventory Management for Your Equestrian Tack Room
- Conclusion
Last Updated: August 16, 2026
A disorganized tack room costs you more than just time. Misplaced gear delays your pre-ride routine, poorly stored leather cracks faster, and cluttered spaces create safety hazards. This guide walks through every step of organizing your equestrian tack room, from the first purge to a digital inventory system that keeps everything accountable.
We cover seven concrete steps that address pest-proofing, humidity control, ergonomic workflow, and long-term maintenance routines. Whether you're managing a single-horse setup or a barn with multiple horses and riders, the framework scales.
Step 1: Declutter and Purge Before You Organize
The biggest mistake riders make is buying storage solutions before deciding what's worth keeping. Organizing clutter just relocates it.
Start by pulling everything out and sorting into three groups: keep, repair, and discard. Be honest. A bridle with cracked leather beyond conditioning is a liability taking up wall space.
A practical purge checklist:
- Check every piece of leather for cracking, mold, or broken hardware
- Test all buckles, snaps, and closures
- Discard any equipment with compromised structural integrity
- Set aside items for repair with a realistic deadline (if it won't be repaired in 30 days, discard it)
- Separate seasonal gear for rotation storage
- Identify duplicate items
Pay particular attention to saddle pads and blankets, common mold traps when stored damp. According to University of Minnesota Extension guidance on mold prevention in storage, mold spreads rapidly in enclosed spaces with limited airflow, making pre-storage inspection critical.
Purging is also the best time to photograph and document your equipment for insurance purposes. A quick photo log of your saddles, bridles, and specialty gear takes fifteen minutes and protects a significant investment.
Step 2: Tack Room Storage Ideas That Actually Work
Effective tack room storage starts with one principle: frequency of use determines placement. Gear you touch daily belongs at eye level and arm's reach. Seasonal equipment belongs up high or in a separate storage area.
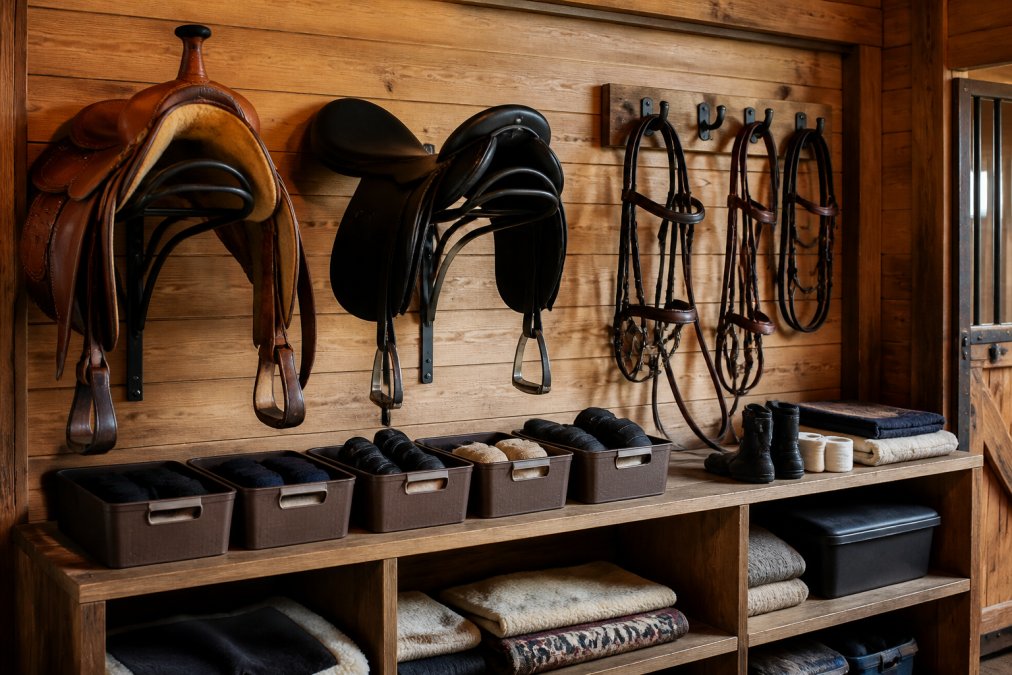
Saddle Racks and Bridle Hooks: Maximizing Vertical Wall Space
Wall-mounted saddle racks keep your saddles off the floor, protect the tree, and free up square footage for movement. The GOLASON 3-Tier Wall-Mounted Saddle Rack handles both Western and English saddles across three tiers at $163.99. For a two-saddle setup, the Paterr Wall-Mount Saddle Rack Set at $104.99 includes saddle pad storage on the same unit.


Bridle hooks should be mounted at eye level, spaced far enough apart that bridles hang without touching. The Intrepid International 4-Hook Bridle Rack at $56.99 is a compact option that works well for riders who move between barns.

The HDEYGIOU Wall-Mount Helmet Rack 4-Pack at $76.99 keeps four helmets secure and visible.
Bins, Shelving Units, and Labeling Systems
Shelving units handle overflow: grooming kits, bit storage, hoof care supplies, and first aid equipment. Adjustable shelving is worth the extra cost because your storage needs will change seasonally.
Use clear storage bins wherever possible. Clear bins are functional even when labels fade. A consistent labeling system that includes contents and owner (in shared barns) eliminates confusion.
Step 3: DIY Tack Room Organization on Any Budget
DIY tack room organization is one of the best-value projects in barn management. Most materials are available at hardware stores, and repurposed furniture often outperforms purpose-built tack furniture.
Practical DIY approaches:
- PVC pipe bridle racks: Cut PVC pipe into 8-10 inch sections, cap one end, and mount them to a board. Each section holds one bridle cleanly.
- Repurposed wooden ladders: An old wooden ladder mounted horizontally creates instant storage for blankets, saddle pads, and coolers.
- Pegboard walls: A full sheet of pegboard with assorted hooks handles grooming tools, lead ropes, and small equipment.
- Repurposed kitchen cabinets: Upper kitchen cabinets mounted at shoulder height create enclosed storage that keeps dust and pests off supplies.
- Wooden crates as modular shelving: Stack and rearrange as needed. Secure them to the wall to prevent tipping.
The real advantage of DIY is customization. A prefabricated solution assumes a standard setup. Your barn almost certainly isn't standard.
According to The Humane Society's guidelines on barn and stable management, proper equipment storage directly affects horse welfare by reducing injury risks from loose gear and maintaining cleaner environments.
Step 4: Plan an Ergonomic Equestrian Tack Room Layout
Most tack room layouts are accidental. An ergonomic layout is one where your workflow determines placement, not available floor space.
Map your routine and design backward from it. A typical pre-ride sequence: enter the tack room, grab grooming kit, groom horse, return for saddle pad and saddle, tack up, grab helmet and gloves. Your layout should mirror this sequence spatially. Grooming kits near the door. Saddle pads and saddles at the center of the wall. Helmet and gloves at eye level near the exit.
The most common ergonomic mistake is placing heavy items too high. Saddles are heavy. Pulling a 30-pound Western saddle off a high rack repeatedly causes strain and increases drop risk. Saddle racks should be mounted between hip and shoulder height.
| Gear Category | Ideal Placement | Why |
|---|---|---|
| Grooming kits | Near entrance, low shelf | First item grabbed, easy access |
| Saddles | Center wall, hip-to-shoulder height | Heavy; reduces strain and drop risk |
| Bridles | Eye level, center wall | Daily use, need visual inspection |
| Helmets | Eye level, near exit | Last item before mounting |
| Seasonal blankets | High shelves or separate storage | Infrequent access |
| First aid supplies | Dedicated shelf, clearly labeled | Emergency access must be fast |
| Bit storage | Enclosed cabinet or drawer | Prevents corrosion and loss |
In a shared barn, assign each rider a dedicated wall section or color-coded zone. This eliminates friction and makes accountability clear.
Step 5: Pest-Proof Storage and Climate Control
Pests and humidity are the two forces most likely to destroy your equestrian equipment over time.
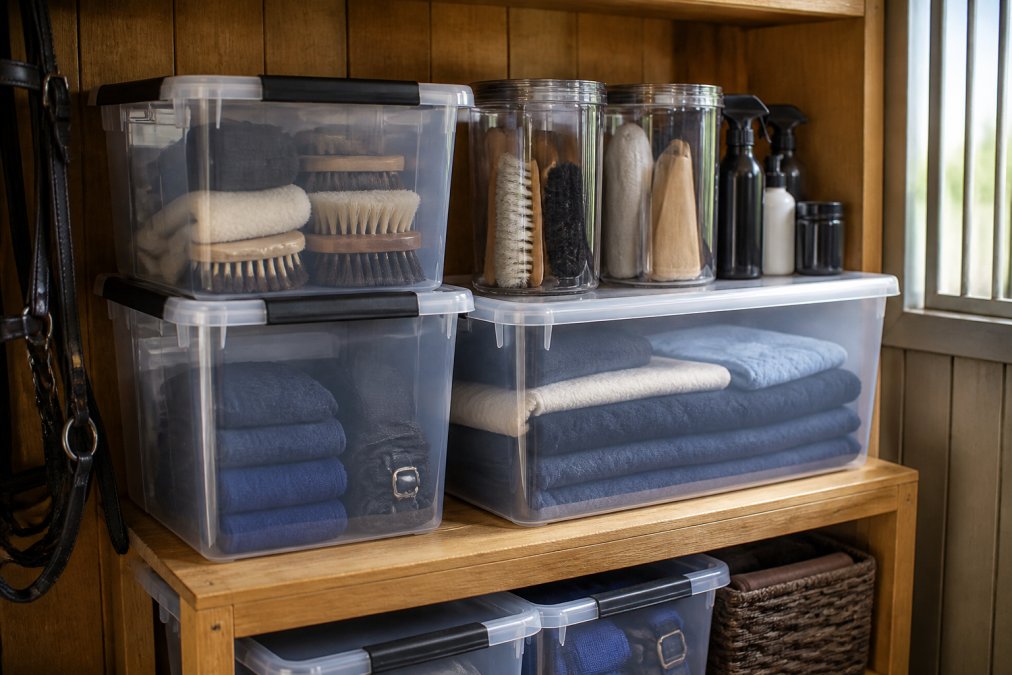
Rodents chew leather, nest in saddle pads, and contaminate grooming supplies. Pest-proof storage means storing feed and grain in sealed metal or heavy-duty plastic containers, keeping leather items off the floor entirely, using airtight containers for fabric-based supplies, and checking for entry points regularly.
Humidity is the slower threat. Leather absorbs moisture and develops mold. Metal hardware corrodes. Saddle pads retain moisture that breeds bacteria.
Practical climate control measures:
- A small dehumidifier running during humid months keeps relative humidity below 60%, the threshold at which mold growth accelerates
- Adequate ventilation prevents stagnant air; even a simple box fan improves circulation significantly
- Avoid storing leather directly against exterior walls, which are colder and prone to condensation
- Cedar blocks or sachets near leather storage repel insects without chemicals
The Environmental Protection Agency guidelines on indoor mold prevention recommend keeping indoor relative humidity between 30-50% to prevent mold growth. A basic hygrometer (under $20) lets you monitor conditions year-round.
Step 6: Tack Room Cleaning and Maintenance Routines
Tack room cleaning and maintenance is where organization either holds or falls apart. A well-organized room that never gets cleaned becomes disorganized again within weeks.
The most sustainable approach is a tiered maintenance schedule:
Daily (5 minutes):
- Return all gear to its designated spot after every ride
- Wipe down any wet or muddy equipment before storing
- Check that saddle pads are hung to dry, not folded damp
Weekly (15-20 minutes):
- Sweep and mop the floor
- Wipe down saddle racks and bridle hooks
- Check leather equipment for early signs of mold or cracking
- Restock any depleted supplies
Monthly (30-45 minutes):
- Deep clean and condition all leather equipment
- Inspect hardware on bridles, girths, and saddles for corrosion or wear
- Rotate seasonal gear in and out of storage
- Check pest deterrents and replace as needed
Seasonally:
- Full inventory audit
- Blanket washing and storage
- Evaluate storage layout and adjust for seasonal changes
Treat leather care as part of tack room maintenance. When you clean the room, you check the leather. When you check the leather, you condition what needs it.
Step 7: Digital Inventory Management for Your Equestrian Tack Room
Digital inventory management sounds like overkill until you're standing in a tack shop trying to remember whether you already have a spare girth, or filing an insurance claim with no documentation.
Your inventory record for each item should include:
- Item name and description
- Purchase date and price
- Condition (update annually)
- Location in the tack room
- Photo (especially for saddles and high-value items)
- Replacement notes
For barn managers overseeing multiple horses and riders, a shared digital inventory removes ambiguity. Everyone knows what exists, where it lives, and who is responsible for it.
Free tools that work well include Google Sheets (shareable with multiple users), Notion (better for photo documentation), or any basic inventory app. The specific tool matters less than the habit of updating it after purchases, repairs, or disposals.
Schedule an inventory audit twice a year at seasonal transitions in spring and fall. This aligns naturally with blanket rotation and seasonal gear swaps.
| Task | Frequency | Time Required |
|---|---|---|
| Return gear to designated spots | Daily | 5 minutes |
| Wipe down wet equipment | Daily | 5 minutes |
| Sweep and clean floor | Weekly | 10 minutes |
| Inspect and condition leather | Monthly | 30 minutes |
| Full inventory audit | Twice yearly | 60-90 minutes |
| Seasonal gear rotation | Twice yearly | 45 minutes |
| Pest deterrent check | Monthly | 10 minutes |
Getting a tack room organized is a one-time project. Keeping it organized is a system. The riders who maintain clean, functional tack rooms aren't more disciplined than everyone else; they've just built habits and layouts that make order the path of least resistance. Horsey Horse Store carries the wall-mounted saddle racks, bridle hooks, and storage solutions that make the physical side of that system easy to build, with free shipping over $25 and a 30-day return policy so you can order with confidence. Start with the wall, work your way to the shelves, and build your maintenance routine from there.
Frequently Asked Questions
What is a good size for a tack room?
A functional tack room for one to four horses typically needs at least 10 by 12 feet of floor space. That gives you enough room for saddle racks, bridle hooks, shelving units, and a grooming prep area without crowding. Larger barns with eight or more horses benefit from 12 by 16 feet or more. The key factor is vertical space: floor-to-ceiling wall-mounted storage lets you fit far more equestrian equipment into a smaller footprint.
How do you prevent mold and mildew in a tack room?
Mold prevention in a tack room comes down to airflow and humidity control. Keep relative humidity below 60 percent using a dehumidifier if needed, especially in humid climates. Store leather saddles and bridles on open racks rather than in sealed bags so air can circulate. Clean leather regularly with a conditioner that contains mold inhibitors. Avoid storing wet saddle pads or blankets inside until they are fully dry, and check corners and storage bins monthly for early signs of mildew.
How can I organize my tack room on a tight budget?
DIY tack room organization does not require a full renovation. Repurpose wooden pallets as saddle stands, use PVC pipe sections mounted to studs as bridle hooks, and install basic wire shelving from a hardware store for storage bins and grooming kits. Labeling everything with a label maker costs under $20 and saves significant time during busy barn days. For wall-mounted saddle racks, the Paterr 2-piece set at $104.99 covers two saddles affordably and mounts without professional installation.
What is the best way to store leather saddles and bridles?
Store leather saddles on padded wall-mounted racks that support the tree evenly and keep the saddle off the ground. A 3-tier option like the GOLASON Wall-Mounted Saddle Rack handles multiple saddles without floor space. Bridles should hang on rounded bridle hooks, never on sharp nails that crease the leather. Clean and condition leather before storage, keep it away from direct sunlight and heat sources, and allow airflow around each piece to prevent cracking and mold buildup.
This article was written using GrandRanker